BLOG
PRACTICE - STRATEGY - PHILOSOPHY - QUICK TIPS - AVOID THE BURNOUT - FUNZIES
|
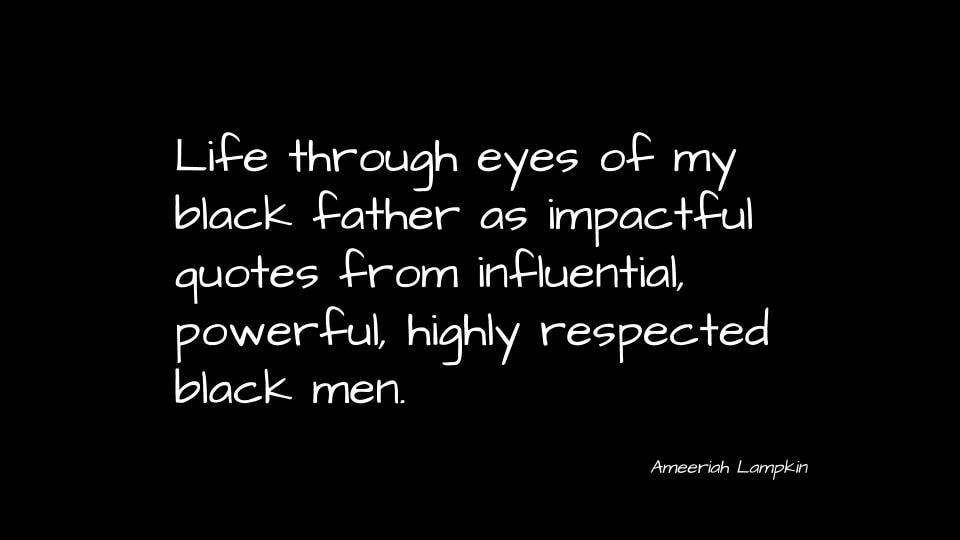
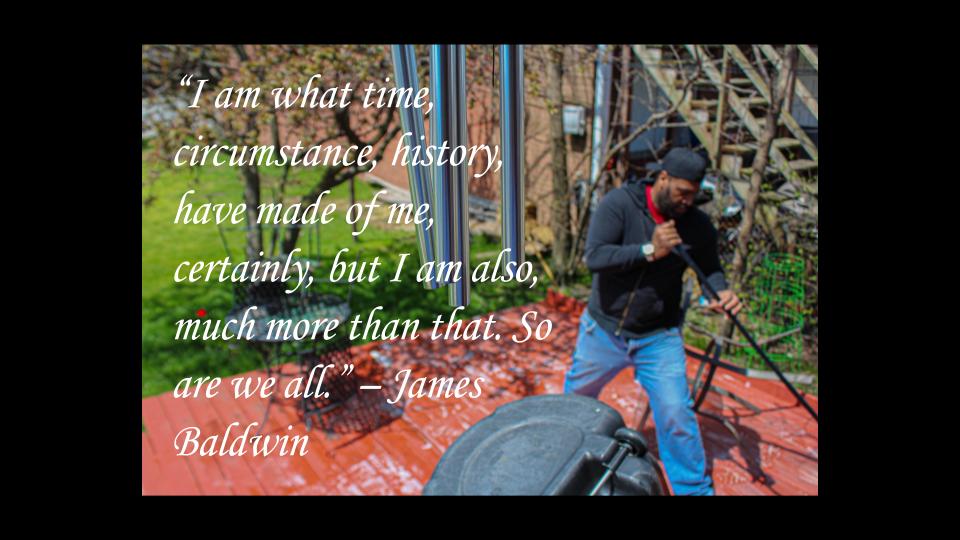
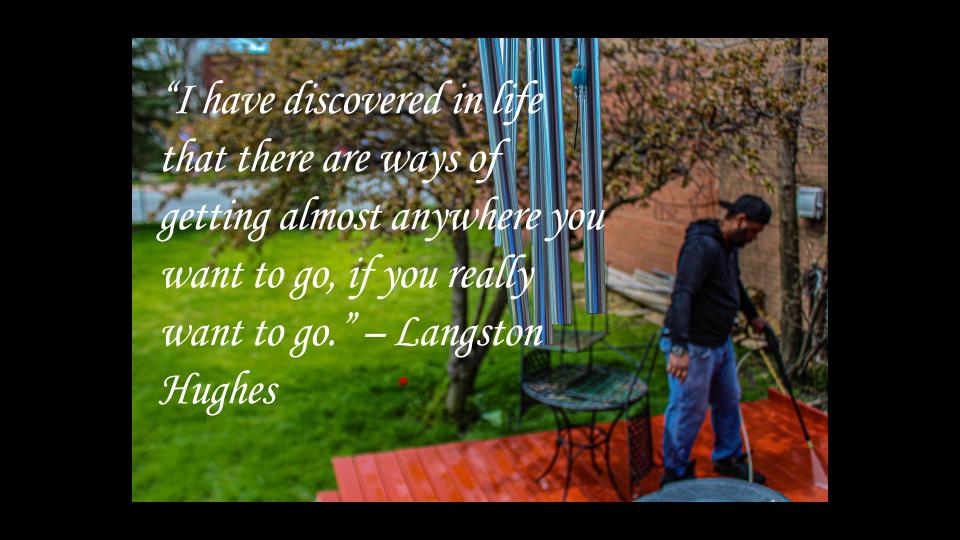
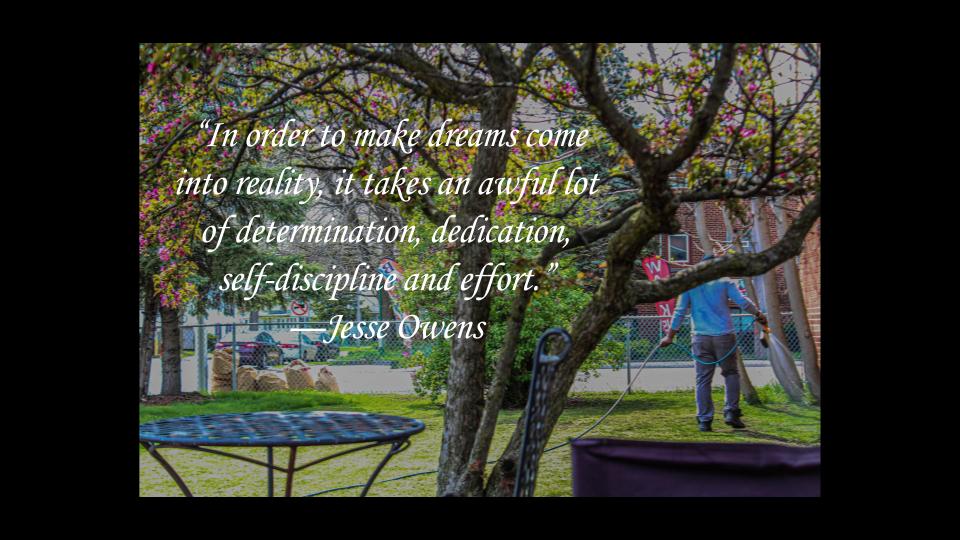
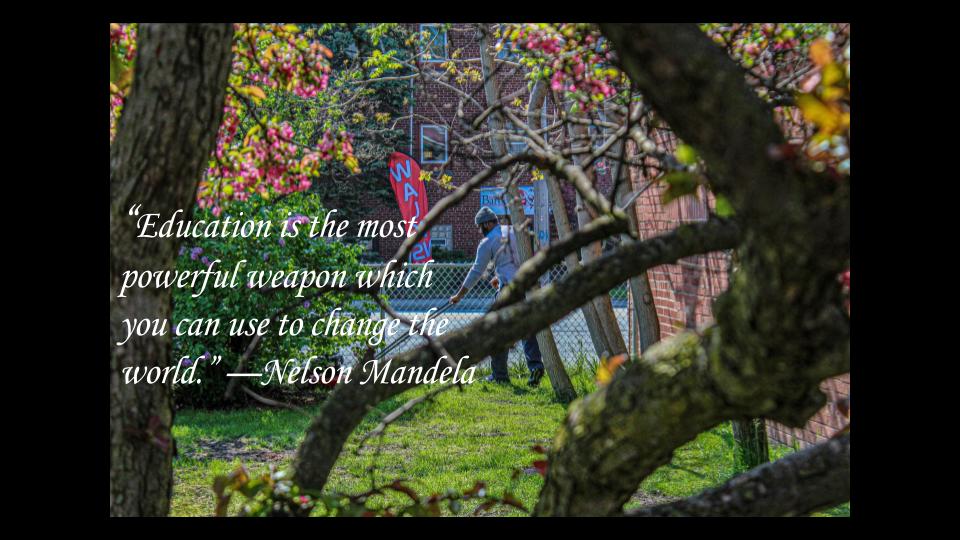
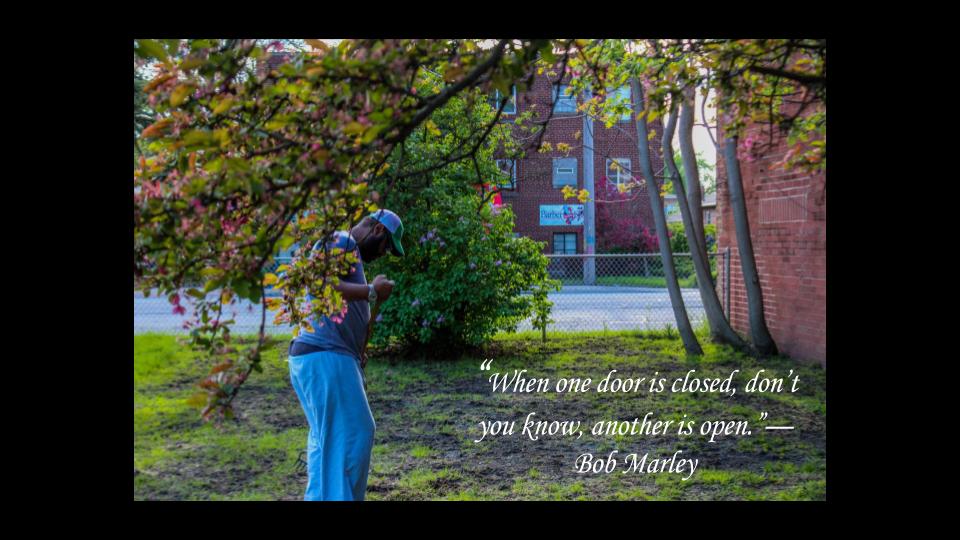
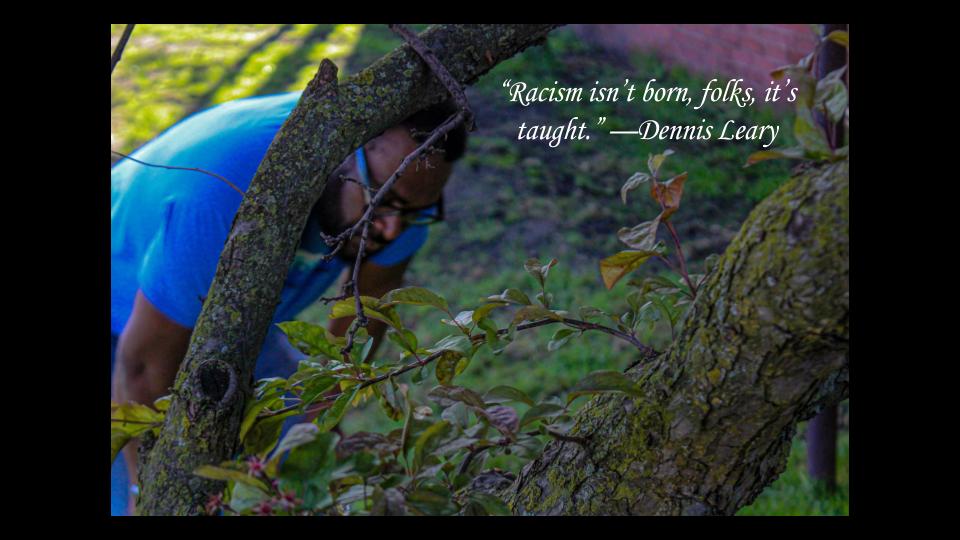
We continue to share the voices of our Black and Brown students as they process the current events. Please reflect upon and share their voices.
0 Comments
The Art Ed Collective would like to provide you with an ongoing list of resources (compiled by Janell Matas and Elizabeth Osborne) for your classroom. This list is certainly not exhaustive, so please comment below and email us any resource suggestions you have. Some of the information was pulled from our own resources, from internet searching, and from all of you who have also worked to collaboratively share resources and continuing the dialogue. We all need to do better to include POC in our list of examples. We all need to work harder to educate ourselves, our students, and our own children and communities. 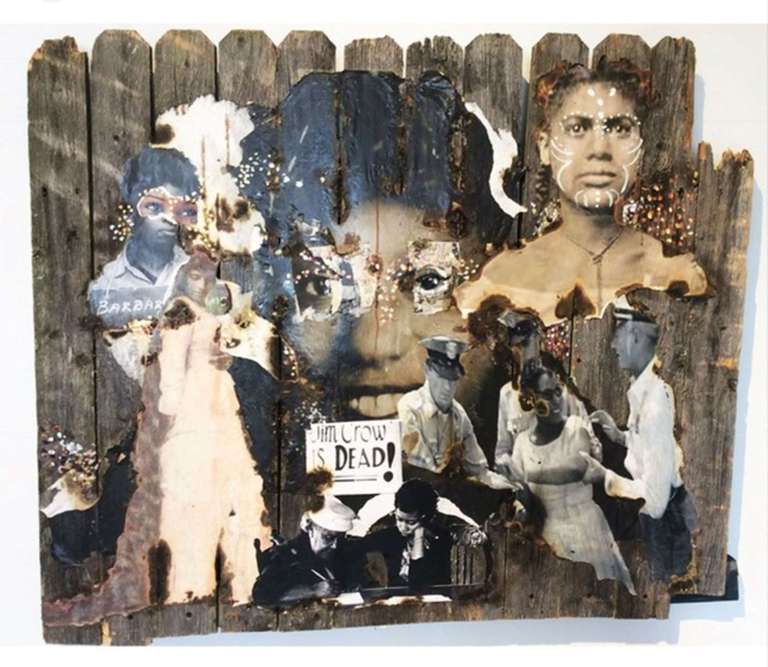 Myths about Choice, Using the SHoM for goal setting, and why you should go to a conference!2/3/2020
As of January 1st, I started writing for The Art of Education University! This is an exciting opportunity and thrilled to be able to share whatever I can. I still plan on writing posts for the Art Ed Collective, of course, especially because I'll be able to write more in my personal voice. In between articles from all of our Collective voices, I thought I'd link all three articles per month that will be published through the Art of Ed. I'll make these in one post at the end of the month once they've all been released. We have some great topics here at the Art Ed Collective to share with you all, as well. Please stay tuned!  Curious about Choice, but feeling nervous about what you've heard from around the art-ed pool? Check out the top 5 myths I hear all the time, and some responses to get you thinking.  Feeling burnt out on your teaching? Bored with your old assignments and prompts? Feeling isolated and missing your educator community? Unsure of a new technique, media, or educational philosophy? Check out these reasons why attending an Art-Ed Conference is for you!  Wondering how to wrap your head around the SHoM? Looking for strategies to support executive functioning? Trying to teach goal setting to your students and need a boost? Check out this article that will give you some strategies and ideas to consider using in your classroom structure.
By Matt Milkowski 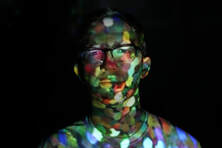 Q: What’s the difference between a duck? A: One of its legs is just the same. This was my grandfather’s favorite joke. Don’t get it? I think that’s the point. This joke may not be busting bellies, but it does have one advantage over its chicken-crossing-the-road counterparts: originality. Originality is often cited as a core value of the art room, but are we confident we know what it is, and why it’s important? Let’s take a quick spin through this tricky concept and share a couple visuals along the way that will make it easier for students to understand, improve, and accept their artistic relationship with originality. Follow me! What is originality? I loosely define originality in the art room as the degree to which an idea, process, or approach is unique. In short, originality asks how different an artwork is from other people’s work. To demonstrate this notion with your students, consider the Family Feud approach: ask them to draw the first image that comes to mind when they hear the word “love." Typically, you will get an overwhelming number of hearts, demonstrating imagery that is not super original. However, we know that assessing originality is not that simple. For example, how does a red symbolic heart compare to a teal one? What if the same heart is crumbling into pieces? Now imagine that it is expertly rendered as a human anatomical heart. Or what if the heart is collaged, made from the real red feathers of a sandhill crane, a species known for its long term monogamous relationships, glued onto your parents original hand-written wedding vows, soaked in tears from your last breakup, and ceremonially burned with a How to Find Love guide book? The point that I am belaboring here is that we mustn’t consider originality in binary yes/no terms, but rather on a spectrum. Why must we be cautious when discussing originality? Originality is connected to many other important art concepts, but teachers should be wary about equating it directly with creativity, artistic success, or higher level thinking. All three of these can be developed independently of originality. At the recent 2019 IAEA conference, Chris Sykora’s excellent presentation on creativity addressed this point, and debunked some myths about originality that many students (and adults) believe. Citing other creativity resources, such as the powerful Everything is a Remix video series, he reminded us that original ideas aren’t magic light bulbs that spontaneously appear above the heads of a select few “born” creatives. Originality stems from spending lots of time engaging in the creative process, and stretching the ideas of our predecessors. Sykora also noted the tangled ideation theory, reinforcing that all of humankind’s ideas are connected to each other. Every single thought we have ever had individually, is by nature a recycled version of someone else’s. We can not invent that which we have never first observed, experienced, or known. Not that the world needs more dead white guy quotes, but Charles Baudelaire summed this one up neatly: “Nearly all our originality comes from the stamp that time impresses upon our sensibility.” Taking time to explain to our students that originality is a learnable skill (not a preordained gift) will help them buy into the process of progressing along the spectrum. What is the role of originality in the classroom? A secret wise teacher (Janet Taylor) from a mysterious distant land (Naperville, IL) once said, a teacher should root their curricular and instructional decisions in response to two key questions: What do I value? and What do I know? I think every teacher must think about these questions, as well as the goals of their course, department, and community when reflecting on the role of originality in their art class. All teachers value originality in their class on some level, from personal essays in English, to unique hypotheses in Science. However, we must reflect on the needs of our students, and consider the degree to which we emphasize originality in our curriculum and assessments. Training our students to increase originality has loads of obvious upside. This includes fostering ownership, creative thinking, and having a more insightful understanding of visual culture. Originality is also a trait that can help students in all disciplines, so it has good lasting power for non-art majors. On the flip side, teaching students to be more original requires a lot of scaffolding and support, and can sometimes backfire, in which the high risk nature of generating original ideas or processes can result in a lack of confidence if not structured with care. Also, one could argue that while high-functioning originality is a universally helpful trait, it certainly isn’t required to succeed in a number of careers, including some art and design careers. Where do I stand in my own classroom, you gingerly ask? I still wrestle with the right ratio of originality, and definitely have higher expectations for the advanced level courses that I teach. I also raise a concerned eyebrow towards teachers who bash or belittle student artists for lacking originality. What I know is that I want to help my students demystify originality in the classroom. I want to help them accurately identify where on the spectrum their own artwork lands without attaching broad-stroked judgment. An emerging artist shouldn’t be shamed for mimicking, as it is a natural and necessary part of artistic growth that all artists engage in. Mundane value scales, copying manga, and ripping off Pinterest ideas all lack substantive originality, but have immense value in other areas. No one expects musicians to jump into songwriting before learning a couple other songs, nor a chef to invent a new dish before mastering other recipes. I do, however, want them to become self aware of their originality footprint, and track their growth over time. You may now be asking yourself: How can I help my students identify and track their degree of originality? Over the years, I’ve noticed that I constantly repeat myself when providing student feedback regarding ways to increase originality. This year, I made 2 new resources that students and teachers can use to tighten up and pinpoint the various levels of originality we commonly see on the spectrum. Before we take a looksies, let’s take a disclaimer break: Disclaimer 1: These spectrum resources do NOT address plagiarism or cultural appropriation, which are important and should be discussed separately. Disclaimer 2: I am primarily a drawing and painting teacher. These resources target students that make artwork inspired by other visual imagery. Hopefully this applies to many other artistic disciplines, but alas, it may not. Disclaimer 3: I haven’t used any of these yet in my own practice. I JUST made them, and am excited to roll them out, especially as my AP students begin their Sustained Investigations. However, I have not yet tested these formal spectrums, and have no evidence to support their effectiveness. Adventure Awaits! OK, let’s dive in: Resource 1: The Simple Originality Spectrum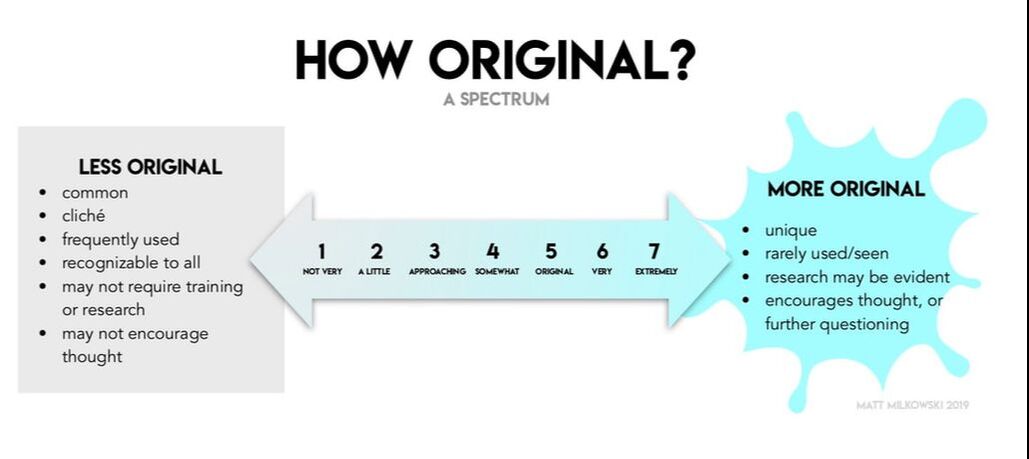 This basic spectrum provides a numeric originality value of 1-7 with light subjective descriptors. It is bookended by general terms that separate less original content from more original content. Of course the numbers can be modified to any quantity, but students can use this quick tool to evaluate the level of originality of a given piece. This could be presented as part of a rubric, as a resource for consideration throughout the year, or even projected or posted during critiques. I encourage you to tinker with the numbers, descriptors, and format to find a fit that’s best for your students. Resource 2: Targeted Originality SpectruM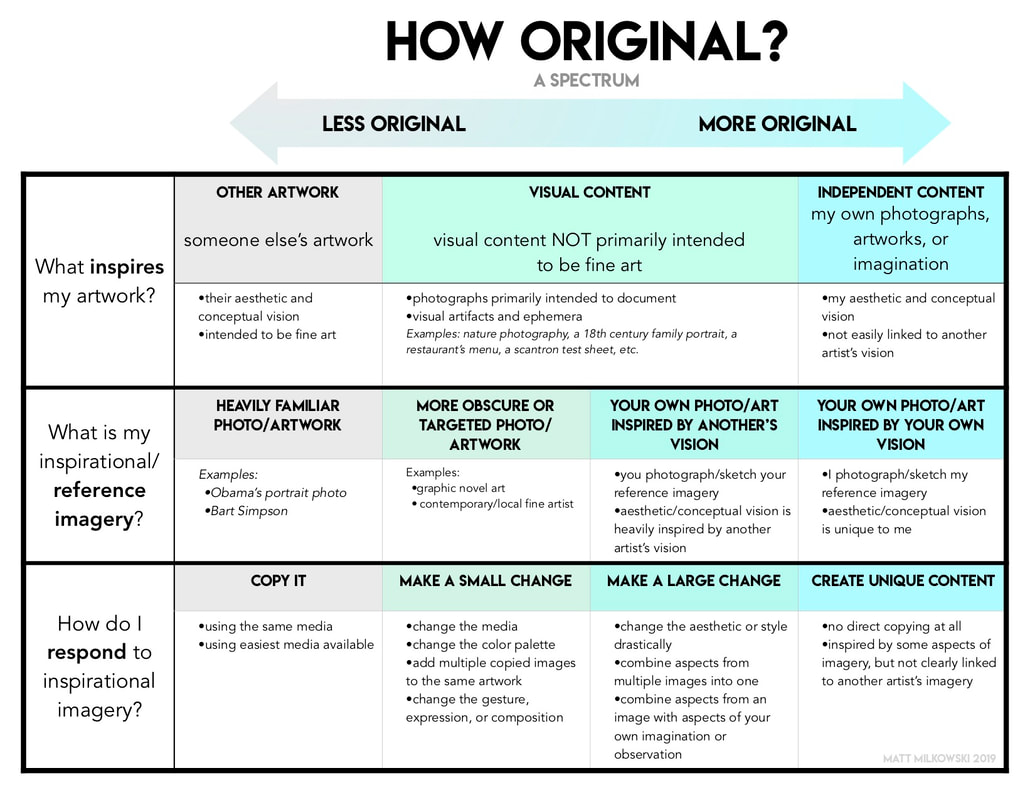 This spectrum is also used as a diagnostic tool. However, it focuses on targeted questions and processes that students must consider holistically if they aim to improve originality. Here, I move away from a numeric scale, and instead sink into more descriptive criteria. I split the spectrum into 3 connected, but separate questions:
How can I use the originality spectrums? Depending on your needs, you may prefer one spectrum over the other, or use both for different reasons. Even better, make your own unique version. Regardless of the format, here are some activities and applications of the spectrum(s) to consider:
Conclusion
So many other fine arts courses are praised for evidence of technique, yet they are not often expected to demonstrate originality. Band and chorus perform songs written by others. Drama performs plays written by others. Culinary cooks recipes made by others. Only in the visual arts are students frequently expected to master technique and high degrees of originality. While we know that this is what makes our rooms so special, we must also give ourselves and our students a break for taking on this difficult challenge. By removing punitive judgement, busting light bulb mythology, and helping students track their growth with spectrums, the originality challenge can become a little easier to tackle. And you know what they always say: you can’t spell “trying aioli” without “originality!”
We’ve all struggled with students taking practice of skills and techniques seriously. Oftentimes supplies are wasted, students dawdle unsure of direction, or rush right through the practice work to get to the artmaking, or even worse, find no value in it at all that they won’t even do it. However, I believe that if you keep in mind these few easy tips , you will find that more students can improve their skills, their work, how they feel about their art, and ultimately what they are able to achieve. Here are eight important strategies that I have picked up in my 20-some years of teaching. #1 Practice, Practice, Practice and Explore. Time is limited, but students should always have a chance to practice and explore media and surfaces before they get started. For many of my high school students, their intro art class may be their first since 6th grade and the last art class they may ever take. In order to set them up for as much success as possible, I try to give them ownership in practice. Practice can range from structured to loose, but always spend some time allowing them to familiarize themselves with what materials are available to them to make art. One of my favorite strategies is more loosely structured play and practice. In my intro drawing class, I give them pencils of various softnesses and have them figure out when is the hardest, softest, and have them brainstorm what they think what each pencil is good for when drawing. They remember H and B and the number system by learning it themselves rather than me just giving them a pencil. #2 Do not print practice sheets on copy paper unless that is the same surface the artwork will be made on. If you’re going to have students use color pencil on illustration board, why would we ever have them practice color pencil techniques on copy paper, (or even in their sketchbooks) if the surfaces/tooth are completely different? It just leads to frustration on the students’ parts because the tools just do not work the same way; that paper is cheap and the kids know it. If you’re going to have students create meaningful practice, you’re going to need to make sure that they’re using the same surfaces and supplies that they will use on their artworks. I either print on a same/similar tooth paper or have students work on board slightly larger than their artworks and have them use the excess to practice. It’s a pain in the butt cutting paper to 8.5”x11” and feeding it into the copy machine or printer, but it's well worth the effort to see less frustration for students. I even print on both sides when possible to allow students to practice more if they struggle. When money is an issue, I would rather make artworks smaller to save on paper, rather than give them the opportunity to give up and even hate shading (for example) before they even get started with their drawings. Here’s an example from my school YouTube channel.  #3 Practice small and make it manageable. We all know that students want to get to making their art as fast as possible, so make practice small and manageable so it doesn’t overwhelm them or feel like it is a waste of time. I spend anywhere from half a period to 3 days depending on what we are doing. When I first started teaching I remember creating worksheets where students would have to complete a value scale from one edge of the paper to the next. Usually, they rushed through it because it was large and bored them. Instead, now I give students a value scale that is probably only about a half an inch to 2 inches in size. Either I print them on the same paper as their artwork (like the back or the edges), have them draw out with ruler, or even skip drawing borders for scales all together. If students are able to have success with tasks, they get to move on. If not, I have them repeat it over and over again until they have it correct. It is so small that it does not waste their time and I see less frustration and refusal to complete. 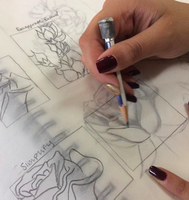 #4 Allow for different approaches to teach skills. As an artist, many of the techniques I use now are not how my instructors taught me. There was nothing wrong with them, but through practice, research and a lot of mistakes, I learned what works best for me. When I teach graphite shading, for example, I teach them my way, but I also show other ways to manipulate graphite as well as provide online demonstrations of other artists so that they can discover works best for them. Likewise, when teaching composition for painting and drawing, I teach various strategies, such as having students compose using cameras, sketching, creating still lifes, considering lighting techniques, and trying different angles and viewpoints, for example. #5 Record your demonstrations. Making videos of your demonstrations may seem like extra work, but these are indispensable for absent students, and a great reteaching tool for students to rewatch them in order to master the skills. ( I use them a lot in my piggybacked classes. I teach Painting 1-4 all together and they have saved me a lot of time in the long run. When I have no time or a quiet place to record, I will just record my demonstration in front of my students and upload at lunch. My videos are not highly edited or perfect, but my students have resources I trust that they can access through our Canvas site/Google Classroom, and YouTube. (I can even monitor if my students have watched them on our web-based learning management system.) I now have a recordable document camera (Link,) but I have used my i-pad and phone on a stand in the past. They might not look pretty but they do the job. (Feel free to look through some of my Videos through this link.) Students watch on their laptops, phones or I can project in my classroom screen as review. #6 Assess and give feedback. It’s important to remember to provide formative feedback on practice to make sure you are addressing easy to fix issues before students jump into their artwork. Often, teachers give a score without any explanation or skip grading all together. I find that if I just take a few extra minutes to jot down strengths and weaknesses for each practice piece, students have much more success. I do give points for practice, but it is minimal and does not drastically alter their grade if they fail to do it or mess it up. I use a simple 4-3-2-1 scale. I usually have them redo the small practice if they get a 2 or 1 before they move on. 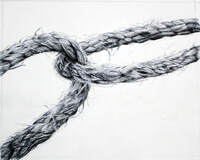 #7 Move past traditional practice. Instead of worksheets, scales, and geometric solids, have student’s make mini artworks that are formative, small, and quick. These works should not be precious and I allow students to restart when necessary. I call these practice artworks, “media exploration” but other teachers call them Boot Camps, Technique Toolbox, Workshops, Challenge Projects. I usually proved a prompt by suggest subject matter, give them compositional strategies, but give them some variations of choices. Students spend at least one day practicing media in sketchbooks or on scraps of similar surfaces and sketching composition. Then, they work in an appropriate size for media, but it should not take more than 5 days to complete. In an intermediate class, they may complete 5-10 of these before they begin assignments based on themes or teaching prompts, but allow for student choice in media and imagery. Here are some examples from my Drawing/Painting 3 class. These works range from 4”x5” to 18”x24.” Smaller sizes for time consuming or tight media, larger for looser or more physically large medias. #8 Make practice low risk. Missing practice or a sketchbook assignment should not kill a student’s grade. Show value in doing through routine, meaningful practice, allowing them to restart if needed and make it worth reasonably minimal points. Allow them to redo the part that needs to be fixed rather than the whole thing. Remember, the point of practice is to improve skill. Make practice as pain free as possible for them and you, and I’m sure you’ll see a shift in your students’ artworks, too. In what ways do you implement practice in your classroom?
Share your strategies and thoughts below!
 Collecting data for your evaluation can become student driven and process inclusive. Collecting data for your evaluation can become student driven and process inclusive. About 7 years ago, there was a shift in how educators in Illinois would be evaluated, and the state moved to the Danielson Framework. 80% of the teacher evaluation would come from this framework, while 20% of your individual teacher evaluation be comprised of student growth. At that time, it was determined that individual districts would be able to decide how or where the additional 20% of student growth for this overall assessment evaluation would be collected, given a few options. Some districts decided that this growth should be tied to the individual teacher (if your particular students demonstrated growth or not), while other districts, like the one I work for, decided that student growth would be tied to the school's overall state mandated SAT scores, which in theory holds the entire school accountable for student learning, or in this case demonstrating standardized growth measured by a for-profit group. This is not to say that I’m making any judgements here (cough cough). But, turn back time those 7 years ago when the districts were still looking at which data to inform where student growth should be measured. I could say that that was truly when I started thinking about student growth in a larger sense. As I’ve spent the past 5 years exploring TAB (Teaching for Artistic Behaviors) and developing Choice in my classroom, I decided it was time to dig in to collecting authentic evidence of student growth, because regardless of what the evaluation stated, student growth was truly what I was most interested in anyway. At that same time, our school went 1 to 1, each student receiving a Chromebook, and while CANVAS (our learning management system- LMS, which seems to be similar to Google Classroom) had existed prior, now our school was moving lightening speed into the world of technology. Perfect timing! As always, there are a thousand ways to do this that may work best for you, and if we wait 5 more minutes, something new and better will be out there to use. In the meantime, here are a few that we have tried. Q: What are some ways that we can use technology to document evidence for student growth in our classroom? 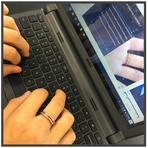 STILL SHOTS: iPad, phone, camera, screenshots, Chromebook camera Most students need to know what to document, how to document, and how often to document their process. Since they have their phones on them all the time, the phone is a great resource and students can upload to their Google Drive (with the App), or plug their phones into their computers/chromebooks and upload. Once you give them reminders, or expectations of how often, most students will continue to document on their own… and then post to their Instagram accounts. It’s up to you and the pace of your class as to how often. It also works great when you give the students specific expectations on what you are looking for in their documentation, or what it will be used for (demonstrate how you used repetition in this artwork; ask your peer a question about your work; explain how your chosen materials impact meaning; demonstrate planning through your sketches and research), students do a better job of documenting their process to hit those specific expectations, and not just some random shots. When using Google Slides (see portfolio below) and Docs, students can add these process shots, and actually annotate them with circles and arrows and text, or can screencastify themselves talking about their process shot and link it right in the portfolio. I (Janet) have spent time teaching my kids how to use a DSLR to photograph their work, but honestly, the iphone works great and is all that is really needed at this level, and the kids will just use their phones anyway. DSLR training (in my opinion), for the purpose of documenting artwork other than photography, is a worthwhile “good to know” and not a “need to know” skill. Our classes are semester long, so I really don’t teach DSLR photographing techniques until AP… and even then, I don’t feel like we have time to truly make sure they are getting those documenting and editing skills as they are also trying to assemble their portfolio. There are also really creative ways to create iPad stands with PVC and such (just google it). If you have a class or department iPad (thanks to grants!), you can set one up and have the students document their process or finished works, and then you’ll have all photos in one place. Janet has also created several different types of DIY light boxes and display areas for students to photograph against or in. That’s probably a different post, but if you make spaces for your students to access to document, you’ll find that they will indeed use them throughout their process. VIDEO RECORDING: Done on the chromebooks (there’s no excuse when the district provides- but we have run into quality issues for sure), on their phones, or renting or borrowing video and time lapse cameras from our school tech office/library) students can also use this easy to access option to…
Janet absolutely loves having students take timelapse videos of their process (especially longer processes like a multilayered painting or subtractive carving from a block of plaster). They can quickly review their results and bask in their achievements (from block to… something!). Some students become obsessed and now seem to timelapse all processes and share them on their own volition. To that, Janet says, “mic drop, I’ve done my job.” SCREENCASTIFY Screencastify is an extension/app to allow you to screen-record (I personally use Quicktime as I’m a Mac user). Also a great way to provide feedback to students. You can scroll through a document, and Screencastify can record your feedback, or students talking about their work to walk you through their thoughts. Joy uses screencastify to record the computer screen and the students voice while they are presenting their work in class. She then has a MP4 recording of the students so they can view it to improve their presentation skills and future content in their Sway (see below). This is also a great tool to use when you are making the transition to portfolio assessments. Q: What are some ways to organize the collected process evidence to demonstrate growth? 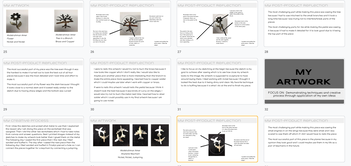 A slice of a student's Google Slides portfolio: documenting process, artwork, annotating for vocabulary and understanding, reflecting on process and product. A slice of a student's Google Slides portfolio: documenting process, artwork, annotating for vocabulary and understanding, reflecting on process and product. GOOGLE SLIDES: Janet: I create a template for my students (they copy and paste) that has required information that they need to include, but I allow them to aesthetically do whatever they want to it. Level 1 templates are more structured (process, end product, specific reflection questions), and by level 3 and 4, I expect them to create a Google Slides portfolio that demonstrates their learning in their own framework. I still have guiding questions and such, but don’t provide an actual template for them to copy. Google Slides can be shared with me directly, where I have them moved them into a folder for that class so I can access at any time. I’ve also made several different submission links on Canvas for them to submit when they are ready, or when I provide an in-progress check. They can also just add to this portfolio each semester as they move into advanced levels, or into other art classes/media. Another goal is to support students who move into AP Studio Art, so that they are used to the process of documenting process, but also then have a collection of past works for their college application or scholarships and we aren’t trying to dig around last minute. In AP Studio Art, student Google Slides portfolios are created throughout the year, building including planning, process, and finished artworks. I keep all of these in one folder, to which all ap students have access to and share. When peer or group critiquing happens, they all have access to just open up their portfolios and create a slide right in the portfolio to comment to that artist. I also love that you can insert recordings, or photos, or whatever to show process. Downside? A lot of times the kids will insert videos from their personal Google accounts and I have to remind them to use their school account, or have to request access, which is just a little bit annoying. BLOGS OR WEBSITES: Joy- I have tried blogs and websites and my students were not into it. I started using Google Sites to create a file for resources and videos but we had a paid platform for the whole school so I was fine with staying with the paid platform. One thing to know is when you create a Google Site the content doesn’t stay year to year. You have to build it over every year. I would have too much content to keep redoing every year. Janet re Google Sites- I don’t use this but have looked into it… another teacher attempted this, but I think it takes up more time to do than is worth. SEESAW: Janet- I’ve not used this, but a lot of TAB teachers use it. My own children’s school/classes started to use this last year. As a parent, I LOVED THIS! I was able to see snippets of what the kids were working on in the classroom, I enjoyed hearing teacher and student interactions, and my kids would send me little learning videos which absolutely MADE. MY. DAY. (Working mom for the win with this app!) But, unfortunately, like all good things that are too good to be true, it lasted about two months, and I never heard a peep from my kids or their teachers again via Seesaw. This app is blocked in our district, and I personally found it not super user friendly on the teacher end of things. But, maybe I’m also just a creature of habit. SWAY: Joy- It is a Microsoft product that works like a “dressed-up” Powerpoint. I have always emphasized to my students to document and show your progress. I tried many different platforms but I have found Sway to be a wonderful way for my students to create a digital sketchbook and documentation of growth that can be made visible or kept for selective viewers only. “Making learning visible is key for reflection.” My students maintain a Sway for the whole semester that starts with the students submitted Artist Proposal. I do recommend that my students create a Sway first and do some searching for concepts/ideas based on a selected Theme. I have a standard based rubric that students have that helps guide the content they curate for each idea they propose. (Use a Google Form for Artist Proposal with a place to insert link to Sway.) Students can use the search bar provided in the Sway link to find content plus they can organize and design the slide layout to suit their style for presentation. Photos, YouTube videos, music, and websites can be uploaded to the link. My students are required to provide written reflections in a text slide in the Sway about the progress they have achieved and what problem-solving they have done and what do they think they need support with or need to change for a future project. *If the student adds you as a collaborator you can use a text slide and comment directly on the Sway link. My students present their Sway to the class and show the digital portfolio as a tool to explain and show the techniques, progress, and outcome. When the semester is complete the student has a portfolio to use for future references and technique building. I also like this platform because my students can share a link on college applications or share on social media platforms if they so choose. *side note I use screencastify (see above) *If the students use the school email to set this account up they will lose access to the links after they graduate. I recommend they copy the entire Sway and send it to their personal email or begin using their personal email. (Sway has a Copy option that sends the link to a selected email) This is their content and should be able to have control and access to it at anytime. Many of my graduates continued to use their content in college and impressed colleges when they shared the links they established that demonstrated their research, process, growth, and reflections. However YOU decide to document process, you will find a million options out there and you will have to figure out what works best for you and your students. Regardless of how you document, this data is so beneficial: it's eye opening to students to see their own growth, it's a fantastic start to showing your community what happens in your classroom, and it will support your students in their learning process as to WHY the make the choices they make. Remind your students and engage your community with how hard your students work in your classroom, to provide their amazing end products for consumption. What ways do you document your student’s processes?
Comment below to share in the dialogue! By Elizabeth Osborne, Janell Matas. and Janet Taylor
Welcome to the Art Collective's very first podcast! Trying to digest the new AP Art & Design changes? We are too! Three of the Collective Authors discuss our findings from our experience through the AP Summer Institute and what we are also grappling with as we begin connecting the changes to our classroom. UPDATED: We moved podcasts to their very own special page. But you can click on the button to take you to this podcast!
|


 RSS Feed
